My Fiat Doblo Camper Conversion: A Guide
*Caution – this is long read for those looking for a van conversion guide.*
For the past year, I have been travelling up and down the country in my campervan. “Campervan” is a broad term for a vehicle used for both travel and rest, and so given that the quality of rest I get in my van is as variable as the wind direction, I prefer just to call her Daisy.
Daisy is my multipurpose Goes Over Anything but Tarmac vehicle, or GOAT for short. Daisy hasn’t always been a GOAT however. Daisy grew up in rural Preston, and had a happy life as a Fiat Doblo carrying cargo for a tradesperson. In early 2015, I decided it was the perfect time to purchase a van, and so sold my 4 door VW Polo to set the process in motion. My VW Polo had started life as a 5 door, but had since effectively lost one door to a condition known as deadlock, a death sentence to all but the hardiest of car doors.
What follows is my experience of buying, converting, driving and generally **living in a converted camper/GOAT van. (**Fortunately I also live in a house, and so can perfectly compare and contrast the two).
Buying your van
This is the hardest part. Deciding what van to buy with your own hard earned/borrowed/stolen?, money. Vans generally come in two flavours; brand new, or completely trashed with 200k miles on the clock (which says 50k). Occasionally you’ll get a well looked after van with close to 100k miles, but being realistic, vans are 99% of the time company vehicles with heavy mileage often gained during heavy use.
My rule of thumb was to buy a van with less than 50k miles. Vans take a good 10-15k miles to be run-in, so 50k doesn’t sound so bad. The next challenge is to work out what size of van you need. This is an extensive and hotly debated subject, stretching from room space to mpg, but here are my guidelines:
- Where possible get a long wheelbase van. You’ll be thankful for the extra room in the back, especially if you go for a smaller model.
- Purchase a model with reverse parking sensors. If you follow my advice in step 1 and have previously only driven a Polo, this should be obvious.
- For living, the bigger, the better. For driving, the smaller the better. Work out your driving:living ratio and size your van accordingly.
- Ideal large van examples are the VW Transporter (much over priced), Mercedes Sprinter, Ford Transit (newer models preferably).
- Ideal small van examples are the Fiat Doblo, VW Caddy, Peugeot Partner/Expert.
- As a final point, the easiest vans to convert are those with a square profile (floor, roof & walls joining at 90 degrees). Any vans with walls which curve inwards to the roof make the process of converting much harder.
For me, I opted for the small Fiat Doblo with a long wheelbase (LWB/L2). I decided that since this would also be a commuting and shopping van as well as a short term living van, I didn’t want the hassle of an excessively large van. I also figured that I could get everything I needed into the van and so there would be no need to go larger. Finally, the cost of the van was another bonus. You can pick up a nearly new (<15k miles) Fiat Doblo for under £8,000 which stood out, since it would hopefully be much more reliable than a large van with nearly ten times the mileage.
Clearly, the items you intend to carry which therefore influence the size of van you require are very much down to personal preference, but as a guide, I would use my van for everything you would use a car for, with the addition of carrying a paraglider, bike, climbing gear, camping gear, skiing gear and all the necessary clothing, food, utensils, and finally somewhere to sleep. Somehow, I can just about fit all this stuff in the van and have a very comfy night sleep, perhaps two, at a push. I have previously used the van for a 7 day stint, however extended trips require good organisation, and just like a tent, plenty of spare clothes and good weather to keep everything dry.
During the buying process, my choice in purchasing a nearly new van was to retain equity and ensure it lasted 10 years with minimal servicing costs. Through regular trips to Aviemore and areas with a high concentration of converted vans however, it is clear that the best van isn’t always the newest. I’ve seen great £40k VW Transporters, and equally good £2k Ford Transits. So treat the purchase as you would a car. If you are happy for an older model and are prepared for the maintainence, you might be left with significantly more capital to convert your van than if you go all in on the latest van.With the small vans above, you will almost certainly need the long wheelbase version if you intend to sleep in the van. Using the example of Peugeot, the Expert is a medium sized van, in between a VW Caddy and a Ford Transit. For medium sized vans, the long wheelbase is still recommended as much of the volume increase is often gained in the height increase of the van. For large vans, it is personal preference as to how long a van you purchase.
As a final point, but certainly something to consider; I aimed to mostly use my van for solo trips, relying on everyone else to have their own accommodation. In the case that you want to build something more akin to a ‘shaggin waggon’, you’ll certainly want to consider one of the larger vans, and again, ideally in a LWB model.
You’ve done it!
So, you have made the jump and purchased your van. Now is the exciting time where you can tailor your van to the exact specifications you need. The first thing you will need to do is make a plan so you can see where you’re going. What follows is my guide to converting a small van with the aim of transporting the following:
1 x bed to double as a seating & sleeping area
2 x storage boxes for general van equipment (oil/brake fluid, torch, cooker, food, slackline)
1 x storage area for water
1 x cupboard for personal items (toothbrush, tooth paste etc)
1 x set of curtains
1 x small table to cook on
1 x storage area for 2 x 120L kit duffel bags
1 x bike
1 x wine rack including 1980-2016 vintage
The above list includes my main requirements for my van when I drafted my first basic plan. I haven’t incorporated all the elements in my own conversion (such as the wine rack – I like to keep wine up front, just in case), but these were the items I felt made the perfect van.
When I purchased my van, I was both fortunate and unfortunate. Firstly, my van was already ply lined. This was a huge help as it instantly saved £150-200. Unfortunately though, the Fiat Doblo has an incredibly significant bulkhead (reinforced metal sheeting separating the cab and load area).
Once I had properly inspected my van, I was able to get a good idea of everything I would need to complete the conversion process, now with the addition of an angle grinder to grind out a very well riveted bulkhead.
The following is a list of tools and materials I required to complete the conversion:
- Angle grinder with cutting and grinding discs
- Drill (with wood and metal bits)
- Wood screws
- Wood glue
- Wood saw
- Bolts
- Interior paint
- Stanley knife
- Assortment of corner brackets & brass D rings.
- Grommet strip/rubber for bulkhead
- Metal file
For the bed:
- CLS (Canadian Lumber Standard)
- 9mm exterior plywood
- Door hinges
- Corner brackets
- Adjustable feet for legs
For the flooring
- Vinyl flooring
- Flooring tacks
- Caulk/wooden floor sealant
For the curtains
- Curtain material
- Curtain hooks
- Metal rod
Bulkhead removal
Once you have purchased everything you need, the first point of call is to remove the bulkhead. It is important to note that bulkheads are a security feature of a van, and so are often reinforced and very resistant to cutting. As an example, my bulkhead consisted of 2 sheets of reinforced 5mm aluminium. Standard aluminium would have been easy to remove, however the reinforced nature of the bulkhead meant I went through 1 grinding disc and about 5 cutting discs. A point to note is that the bulkhead on a Fiat Doblo is riveted and incredibly difficult to remove intact. Whilst this process certainly added considerable difficulty to the conversion process, standing in the back of a pitch black van whilst grinding out a bulkhead and sending sparks flying over my head like some sort of gothic disco is certainly one of the coolest moments I’ve had.
I decided to take out enough bulkhead to be able to move between the cab and loading area with relative ease, but leave enough bulkhead to act as a support to the bed and leave the van with at least some structural integrity; not that I planned to roll the van.
Eventually, I took the bulkhead down to a height just lower than the head rests, and then after filing away the sharp edges, I covered the inside edge with the inside of a road bike tire drilled and screwed to the bulkhead sides which perfectly allowed safe passage between the two compartments.
Flooring instillation
Once the bulkhead has been removed, the flooring can be installed. I opted for wood effect vinyl flooring for a number of reasons. Firstly, since I would often be carrying a bike, I wanted something which was easy to clean. I had previously considered carpeting the van and having a shag pile rug for the ultimate luxury finish, but bike oil, mud, and general dirt wouldn’t mix well with fine wool, and so practicality prevailed. Again, it is important to note that the smaller the van, the more practical you need to be since there simply isn’t the space to segregate the bike area from the oriental relaxation and aromatherapy area.
Laying flooring is easy. Simply cut the vinyl to a size just bigger than the floor of the van, and then take the vinyl inside the van and cut to the exact shape of the ply floor. You have two choices here, either bathtub where the vinyl extends up the walls a few inches to contain any water, or trim exactly to the floor shape and then caulk/seal the vinyl to the walls. Since I wasn’t expecting to be carrying around lots of wet gear, I opted for the second option, using flooring tacks to hold the vinyl in place.
Making the bed
The bed I made for my van is possibly the strongest structure I have ever created. When I finished putting it together, I was actually surprised with the quality of the construction.
Prior to getting to that point however, there were a few decisions to make. The bed is the item which takes up the most room inside the van, and so getting it right is important. The first uncompromising feature of the bed has to be its length. You need to be able to lie down as you would at home. Not touching the ends of the van (hence the long wheelbase), and easily able to get a good night’s sleep before or after a hard day in the hills; this is critical for enjoyment. There is one further feature necessary; the bed must be flat. This seems obvious, but it is an important consideration to make given that you will be limited to parking on flat roads, or non-cambered roads if you design your bed across the width of the van.
There are many ways to install your bed. It could be fixed, it could be semi-fixed (a wide bed which folds in half), it could be hinged (where the whole bed folds up on the side of the van), or it could be a completely removable freestanding bed. This totally depends on the size of your van, your intended usage, and also your design skills. This is also where it helps to have a square profiled van to aid with easily manufacturing everything to fit.
I decided upon the hinged bed, thus giving me room to store and transport a lot of kit such as moving house where the bed wouldn’t be needed, but also giving me the ease of simply lowering the bed when required. I decided on a slightly wider than standard single bed, which gives just enough room for the bed and a bike to be stored in parallel, with everything else stored under the bed.
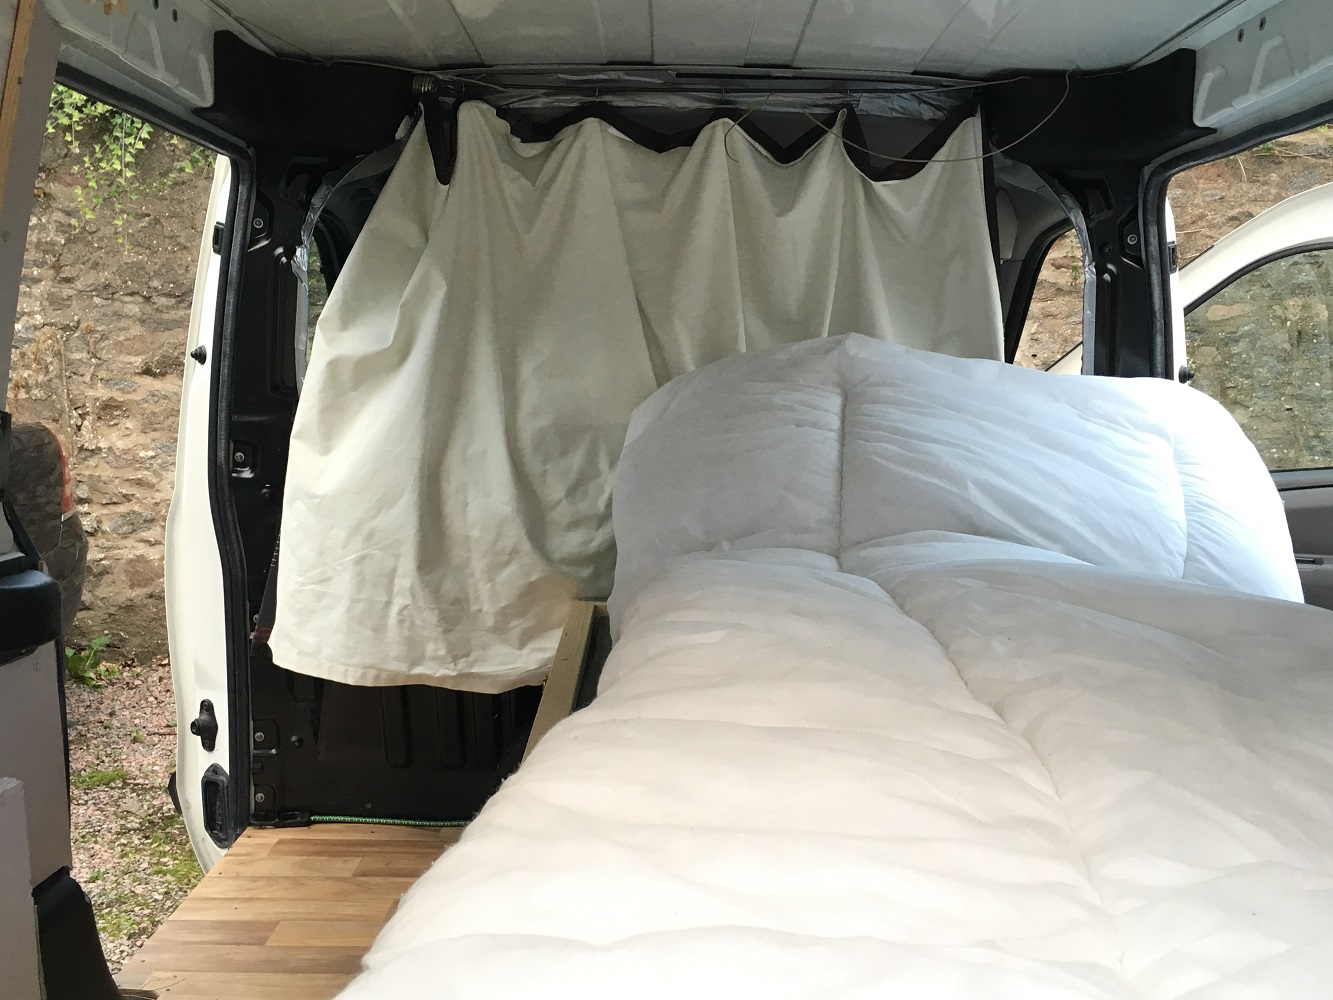
To make the bed itself, I simply took 4 pieces of CLS timber for the outer frame. I screwed and glued these together (with corner brackets), and once dry, placed 10 inch strips of 9mm plywood on top to make the ‘springs’. I screwed and glued these in place and once dry, turned the bed over and filled the inside with a large 5 inch thick foam mat. Once in the van, this would be covered with an inflatable mattress to finish the bed off.
The bed was the most difficult thing to install as it had to be the right height to fold up inside the van, but also the right height to sit on. It also had to be supported by relatively thin ply lined walls, so I decided to reinforce everything as best I could with the remaining CLS timber.
For the installation of the bed into the van, I decided that the bed would need 5 supports to hold sufficient weight without any risk of it collapsing during the night. For the first two supports, I screwed two hinges to each end of the ply lined box over the wheel arch. This would be the point from which the bed would pivot. I reinforced the wheel arch box with CLS and corner brackets. Next, I screwed CLS into the remaining bulkhead for the top end of the bed to rest on when it came down. Lastly, I screwed two wooden legs on hinges to the side of the bed. These would fold away when the bed was raised, and also had adjustable feet on the ends to make sure the bed was flat when lowered.
The bed took one evening to make, and the installation took the best part of a day once everything had been secured and the glue had dried. The final touches were to add two bungee cords hooked on brass D rings across the bed to hold the mattress and quilt in place, and a strap tied from the roof to hold the bed when it was folded upright.
Finishing touches
It may not sound sufficient, but once the van has been ply lined, the bulkhead has been edited, the floor has been laid and the bed has been installed, the van was perfectly suitable for a summer vacation.
The finishing touches of the van centred upon practicalities, such as foam matting and strategically placed bungee cords to secure the bike to the side of the van, especially when navigating rough and twisty roads. Another item I installed was a small table onto the rear door since the van was devoid of any useful flat space once it had been kitted out with a bed.
Curtains are almost certainly required unless you have a large van where it is dark enough in the back not to be seen. Curtains also allow you to get changed and retain what is left of your modesty after opting to live a period of your life out the back of a van. For the installation, I opted for a nice set of blackout Paris themed curtains which I installed on a metal rod running along the top of the bulkhead.
Other necessities are the ratchet straps I installed to keep my storage boxes from sliding around too much when driving on mountain roads, and a nice tea light lantern to retain a homely feel whilst sitting out a Scottish winter storm.
Two final items which I must mention are the two items which really individualise my van, give it a little avant-garde and provide a good conversation starter.
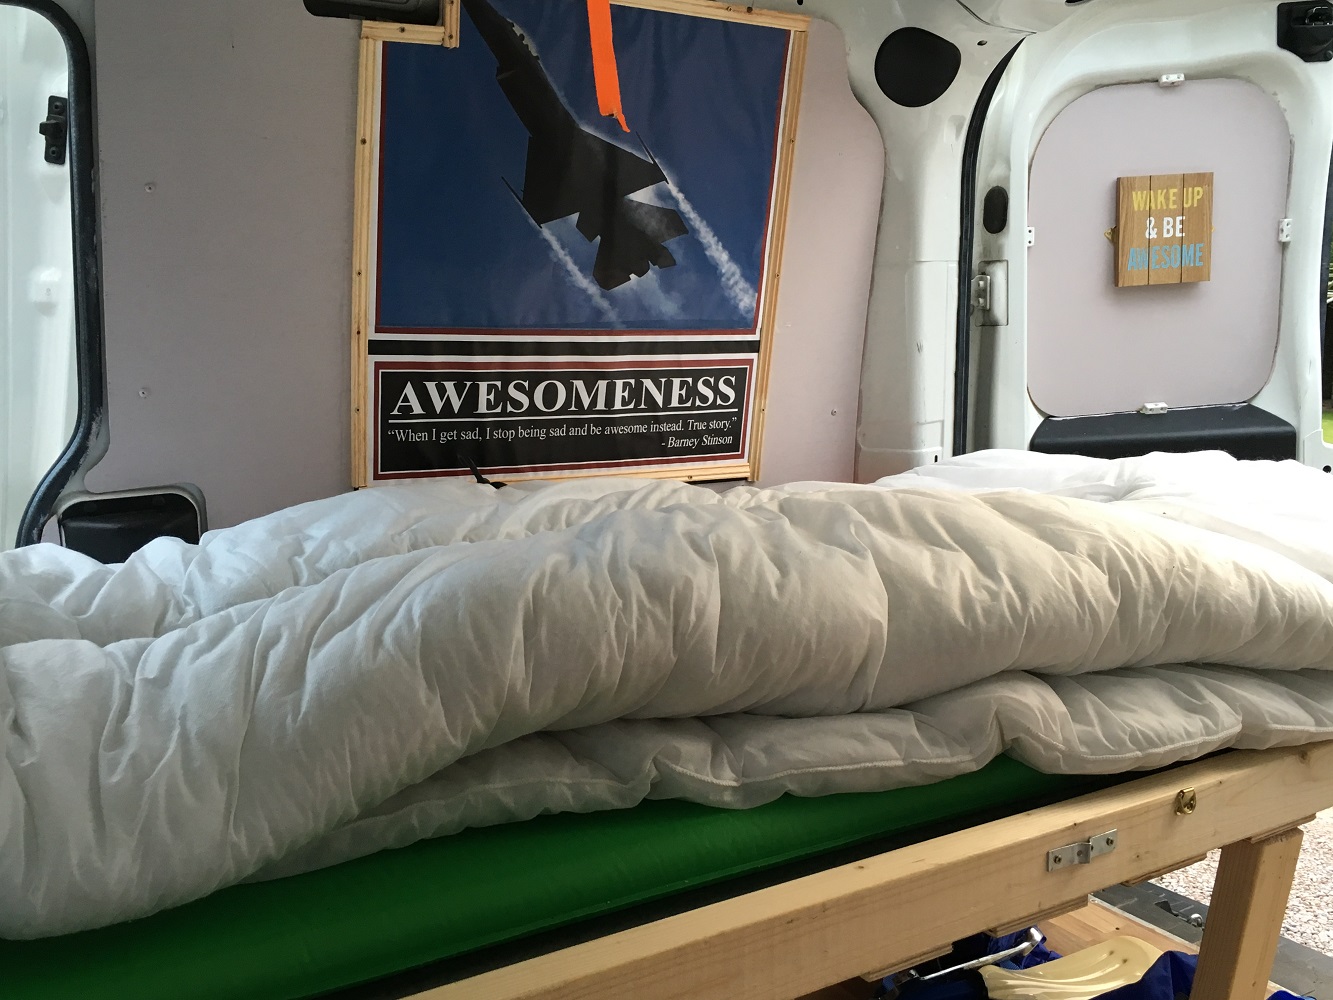
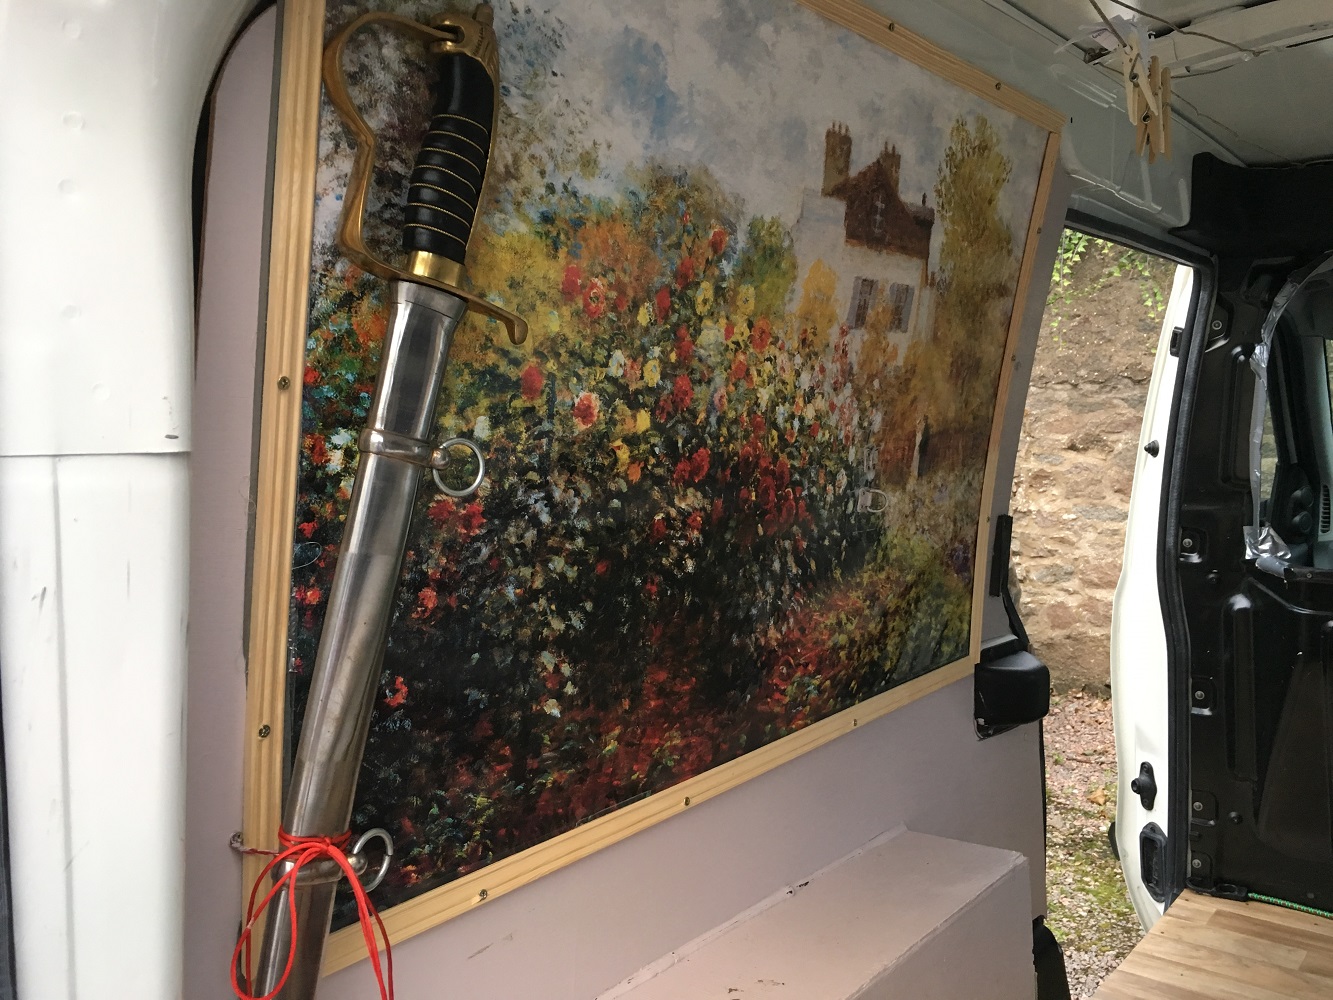
The first is a Monet. The Artists Garden c.1873 to be precise. I do like a good painting, and I thought there can’t be too many vans with one in the back. Sadly I wasn’t able to afford the real thing with my remaining budget, so bought a print instead and framed it in a wooden trim. I then balanced this with a motivational jet fighter poster on the opposing wall.
The second item is a replica Napoleonic sabre. Clearly if you put up a Monet, you also need a classical weapon, and so I chose a sabre for the only reason to ever trump self defence; the sabrage. The sabrage is a rather elaborate way to open Champagne (or Cava and Prosecco), and clearly an absolutely necessary skill to master in order to live a fulfilling van life.
Van life
This final section focuses on what it is like to actually live in the van, post successful conversion. Most guides end once the final nail has been struck, but in reality converting the van is only 1% of the process, albeit 90% of the effort. The remainder of the process is living in the van, either for a night or for an extended period. Only when you actually live in the van will you determine what works and what doesn’t.
I have now stayed in the Fiat Doblo GOAT for perhaps 50 days spread evenly over the past year. I have done both summer and winter trips, and spent at most 7 continuous nights in the van.
What I have learned is that the Fiat Doblo in the long wheelbase model is perfect for short trips for almost any activity when kitted out as above. (The long wheelbase model gives the added advantage of having a sliding door on both sides of the vehicle which does give a little more freedom to search for kit when fully loaded).
The main benefit of this type of van is its size, and thus the ease of driving, parking, and relative fuel economy is notable. At 90bhp, acceleration when merging onto a motorway is less than ideal, however.
Overall, it really is a solid van, and I think the key word is capable. It is capable of doing most things, accommodating equipment for most sports, and providing a decent night sleep, most of the time.
Having been through the process however, there are a few points which I feel are worth noting when searching for the ultimate campervan conversion.
Learning Points
One of the main points to bear in mind when choosing a van is rear windows. The Doblo panel van doesn’t have any, and consequently this means the back of the van is very dark almost all of the time when the doors are shut. This is good for sleeping, however for living, it can be quite depressing to be confined in a dark room, unable to see out. The open curtain does provide a certain amount of light, but nothing beats a set of tinted windows in the back to really keep an eye on the weather and life outside your little bubble.
The rear doors on my van are standard split doors (open left and right) which fully open to allow great access to the loading area. An improvement in this area would almost certainly be a tailgate type door for the single reason that it is a great protector from the rain. After many bike races, I have been left wishing I had a tailgate door to get changed under to avoid the back of the van becoming soaked from my wet and muddy kit. Additionally, when cooking on extended trips, or even just wanting to air the van, it gets incredibly difficult when the rain starts and in honesty is not much better than a tent in that respect. A tailgate simply makes life much more bearable for those days when rain is unavoidable.
Insulation is another key point which I haven’t added to my van, but is worth considering for any winter trips. The roof of most vans is a single sheet of metal, and so any heat quickly dissipates and is replaced with freezing air in winter; in summer the opposite scenario prevails. It is worth taking the time to insulate your van, as even with a heavy duty sleeping bag, it really is quite grim trying to wake up at 5am whilst icicles are gradually forming above your head. Insulation can also be added to the floor too. I purposefully avoided gluing my vinyl flooring so it can be taken up with ease, and an insulating layer can be added underneath. Still nothing beats a shag pile rug for warmth and comfort.
What happens if you really do want a shag pile rug and to also transport bikes and dirty kit? Sadly this is the caveat with smaller vans and thus the only answer to that is to buy a bigger van. No matter how skilled you are and how imaginative you can be, the space in a small-medium sized van is always going to be the ultimate limit. No matter how well you design your space, you are also never going to be able to stand up or even get close to vertical in the small-medium class of vans. For that reason, it is definitely worth considering vans similar to the VW Transporter or the Mercedes Sprinter. With that type of van, your ability to go away on extended trips is also enhanced as you can fit items like a sink, mini cupboard and a fridge which really help avoid the closet syndrome faced in smaller vans after a week or less in harsh conditions.
In the case of vans, bigger certainly isn’t always better, and over my year of use, I haven’t felt particularly restricted due to not having a larger van. There is however one feature which I would recommend for small vans, which only comes second to rear windows: rotating front seats. Rotating front seats really are the holy grail for small-medium sized vans. As anyone who has this type of van will testify, firstly the front seats take up a significant amount of room, and secondly, it is incredibly difficult to design a comfy seat. The obvious solution to this is at least one rotating front seat which delivers a multitude of benefits ranging from increased space in the back right through to feeling a little more human rather than sitting hunched on a poorly designed bed in the back.
Epilogue
Hopefully you can now see that there is so much more to a campervan conversion than simply fitting a bed and hoping for an enjoyable trip. As my final word on small-medium vans, I have found the Fiat Doblo to be a superb van to convert and live in, especially for short trips. It is the ideal van for a DIY conversion, and I think a stepping stone to a full sized van conversion if after a year or three, once you have decided it is for you, and you have the capital to invest in a larger vehicle.