Tag : scotland

post image

My Fiat Doblo Camper Conversion: A Guide

*Caution – this is long read for those looking for a van conversion guide.*

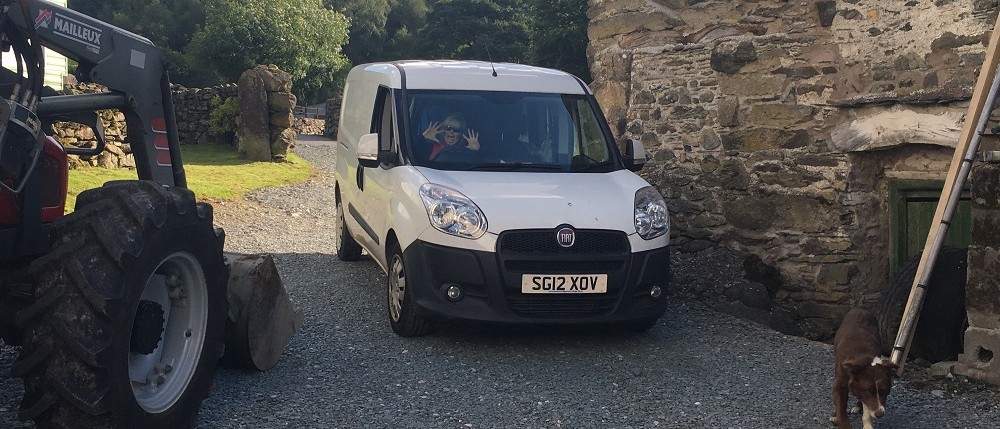
For the past year, I have been travelling up and down the country in my campervan. “Campervan” is a broad term for a vehicle used for both travel and rest, and so given that the quality of rest I get in my van is as variable as the wind direction, I prefer just to call her Daisy.

Daisy is my multipurpose Goes Over Anything but Tarmac vehicle, or GOAT for short. Daisy hasn’t always been a GOAT however. Daisy grew up in rural Preston, and had a happy life as a Fiat Doblo carrying cargo for a tradesperson. In early 2015, I decided it was the perfect time to purchase a van, and so sold my 4 door VW Polo to set the process in motion. My VW Polo had started life as a 5 door, but had since effectively lost one door to a condition known as deadlock, a death sentence to all but the hardiest of car doors.

What follows is my experience of buying, converting, driving and generally **living in a converted camper/GOAT van. (**Fortunately I also live in a house, and so can perfectly compare and contrast the two).

Buying your van
This is the hardest part. Deciding what van to buy with your own hard earned/borrowed/stolen?, money. Vans generally come in two flavours; brand new, or completely trashed with 200k miles on the clock (which says 50k). Occasionally you’ll get a well looked after van with close to 100k miles, but being realistic, vans are 99% of the time company vehicles with heavy mileage often gained during heavy use.

My rule of thumb was to buy a van with less than 50k miles. Vans take a good 10-15k miles to be run-in, so 50k doesn’t sound so bad. The next challenge is to work out what size of van you need. This is an extensive and hotly debated subject, stretching from room space to mpg, but here are my guidelines:

  1. Where possible get a long wheelbase van. You’ll be thankful for the extra room in the back, especially if you go for a smaller model.
  2. Purchase a model with reverse parking sensors. If you follow my advice in step 1 and have previously only driven a Polo, this should be obvious.
  3. For living, the bigger, the better. For driving, the smaller the better. Work out your driving:living ratio and size your van accordingly.
  4. Ideal large van examples are the VW Transporter (much over priced), Mercedes Sprinter, Ford Transit (newer models preferably).
  5. Ideal small van examples are the Fiat Doblo, VW Caddy, Peugeot Partner/Expert.
  6. As a final point, the easiest vans to convert are those with a square profile (floor, roof & walls joining at 90 degrees). Any vans with walls which curve inwards to the roof make the process of converting much harder.

For me, I opted for the small Fiat Doblo with a long wheelbase (LWB/L2). I decided that since this would also be a commuting and shopping van as well as a short term living van, I didn’t want the hassle of an excessively large van. I also figured that I could get everything I needed into the van and so there would be no need to go larger. Finally, the cost of the van was another bonus. You can pick up a nearly new (<15k miles) Fiat Doblo for under £8,000 which stood out, since it would hopefully be much more reliable than a large van with nearly ten times the mileage.

Clearly, the items you intend to carry which therefore influence the size of van you require are very much down to personal preference, but as a guide, I would use my van for everything you would use a car for, with the addition of carrying a paraglider, bike, climbing gear, camping gear, skiing gear and all the necessary clothing, food, utensils, and finally somewhere to sleep. Somehow, I can just about fit all this stuff in the van and have a very comfy night sleep, perhaps two, at a push. I have previously used the van for a 7 day stint, however extended trips require good organisation, and just like a tent, plenty of spare clothes and good weather to keep everything dry.

During the buying process, my choice in purchasing a nearly new van was to retain equity and ensure it lasted 10 years with minimal servicing costs. Through regular trips to Aviemore and areas with a high concentration of converted vans however, it is clear that the best van isn’t always the newest. I’ve seen great £40k VW Transporters, and equally good £2k Ford Transits. So treat the purchase as you would a car. If you are happy for an older model and are prepared for the maintainence, you might be left with significantly more capital to convert your van than if you go all in on the latest van.With the small vans above, you will almost certainly need the long wheelbase version if you intend to sleep in the van. Using the example of Peugeot, the Expert is a medium sized van, in between a VW Caddy and a Ford Transit. For medium sized vans, the long wheelbase is still recommended as much of the volume increase is often gained in the height increase of the van. For large vans, it is personal preference as to how long a van you purchase.

As a final point, but certainly something to consider; I aimed to mostly use my van for solo trips, relying on everyone else to have their own accommodation. In the case that you want to build something more akin to a ‘shaggin waggon’, you’ll certainly want to consider one of the larger vans, and again, ideally in a LWB model.

You’ve done it!
So, you have made the jump and purchased your van. Now is the exciting time where you can tailor your van to the exact specifications you need. The first thing you will need to do is make a plan so you can see where you’re going. What follows is my guide to converting a small van with the aim of transporting the following:

1 x bed to double as a seating & sleeping area
2 x storage boxes for general van equipment (oil/brake fluid, torch, cooker, food, slackline)
1 x storage area for water
1 x cupboard for personal items (toothbrush, tooth paste etc)
1 x set of curtains
1 x small table to cook on
1 x storage area for 2 x 120L kit duffel bags
1 x bike
1 x wine rack including 1980-2016 vintage

The above list includes my main requirements for my van when I drafted my first basic plan. I haven’t incorporated all the elements in my own conversion (such as the wine rack – I like to keep wine up front, just in case), but these were the items I felt made the perfect van.

General tools & materials
When I purchased my van, I was both fortunate and unfortunate. Firstly, my van was already ply lined. This was a huge help as it instantly saved £150-200. Unfortunately though, the Fiat Doblo has an incredibly significant bulkhead (reinforced metal sheeting separating the cab and load area).

Once I had properly inspected my van, I was able to get a good idea of everything I would need to complete the conversion process, now with the addition of an angle grinder to grind out a very well riveted bulkhead.

The following is a list of tools and materials I required to complete the conversion:

  1. Angle grinder with cutting and grinding discs
  2. Drill (with wood and metal bits)
  3. Wood screws
  4. Wood glue
  5. Wood saw
  6. Bolts
  7. Interior paint
  8. Stanley knife
  9. Assortment of corner brackets & brass D rings.
  10. Grommet strip/rubber for bulkhead
  11. Metal file

For the bed:

  1. CLS (Canadian Lumber Standard)
  2. 9mm exterior plywood
  3. Door hinges
  4. Corner brackets
  5. Adjustable feet for legs

For the flooring

  1. Vinyl flooring
  2. Flooring tacks
  3. Caulk/wooden floor sealant

For the curtains

  1. Curtain material
  2. Curtain hooks
  3. Metal rod

Bulkhead removal
Once you have purchased everything you need, the first point of call is to remove the bulkhead. It is important to note that bulkheads are a security feature of a van, and so are often reinforced and very resistant to cutting. As an example, my bulkhead consisted of 2 sheets of reinforced 5mm aluminium. Standard aluminium would have been easy to remove, however the reinforced nature of the bulkhead meant I went through 1 grinding disc and about 5 cutting discs. A point to note is that the bulkhead on a Fiat Doblo is riveted and incredibly difficult to remove intact. Whilst this process certainly added considerable difficulty to the conversion process, standing in the back of a pitch black van whilst grinding out a bulkhead and sending sparks flying over my head like some sort of gothic disco is certainly one of the coolest moments I’ve had.

IMG_0453

I decided to take out enough bulkhead to be able to move between the cab and loading area with relative ease, but leave enough bulkhead to act as a support to the bed and leave the van with at least some structural integrity; not that I planned to roll the van.

Eventually, I took the bulkhead down to a height just lower than the head rests, and then after filing away the sharp edges, I covered the inside edge with the inside of a road bike tire drilled and screwed to the bulkhead sides which perfectly allowed safe passage between the two compartments.

Flooring instillation
Once the bulkhead has been removed, the flooring can be installed. I opted for wood effect vinyl flooring for a number of reasons. Firstly, since I would often be carrying a bike, I wanted something which was easy to clean. I had previously considered carpeting the van and having a shag pile rug for the ultimate luxury finish, but bike oil, mud, and general dirt wouldn’t mix well with fine wool, and so practicality prevailed. Again, it is important to note that the smaller the van, the more practical you need to be since there simply isn’t the space to segregate the bike area from the oriental relaxation and aromatherapy area.

Laying flooring is easy. Simply cut the vinyl to a size just bigger than the floor of the van, and then take the vinyl inside the van and cut to the exact shape of the ply floor. You have two choices here, either bathtub where the vinyl extends up the walls a few inches to contain any water, or trim exactly to the floor shape and then caulk/seal the vinyl to the walls. Since I wasn’t expecting to be carrying around lots of wet gear, I opted for the second option, using flooring tacks to hold the vinyl in place.

Making the bed
The bed I made for my van is possibly the strongest structure I have ever created. When I finished putting it together, I was actually surprised with the quality of the construction.

Prior to getting to that point however, there were a few decisions to make. The bed is the item which takes up the most room inside the van, and so getting it right is important. The first uncompromising feature of the bed has to be its length. You need to be able to lie down as you would at home. Not touching the ends of the van (hence the long wheelbase), and easily able to get a good night’s sleep before or after a hard day in the hills; this is critical for enjoyment. There is one further feature necessary; the bed must be flat. This seems obvious, but it is an important consideration to make given that you will be limited to parking on flat roads, or non-cambered roads if you design your bed across the width of the van.

There are many ways to install your bed. It could be fixed, it could be semi-fixed (a wide bed which folds in half), it could be hinged (where the whole bed folds up on the side of the van), or it could be a completely removable freestanding bed. This totally depends on the size of your van, your intended usage, and also your design skills. This is also where it helps to have a square profiled van to aid with easily manufacturing everything to fit.

I decided upon the hinged bed, thus giving me room to store and transport a lot of kit such as moving house where the bed wouldn’t be needed, but also giving me the ease of simply lowering the bed when required. I decided on a slightly wider than standard single bed, which gives just enough room for the bed and a bike to be stored in parallel, with everything else stored under the bed.

To make the bed itself, I simply took 4 pieces of CLS timber for the outer frame. I screwed and glued these together (with corner brackets), and once dry, placed 10 inch strips of 9mm plywood on top to make the ‘springs’. I screwed and glued these in place and once dry, turned the bed over and filled the inside with a large 5 inch thick foam mat. Once in the van, this would be covered with an inflatable mattress to finish the bed off.

The bed was the most difficult thing to install as it had to be the right height to fold up inside the van, but also the right height to sit on. It also had to be supported by relatively thin ply lined walls, so I decided to reinforce everything as best I could with the remaining CLS timber.

For the installation of the bed into the van, I decided that the bed would need 5 supports to hold sufficient weight without any risk of it collapsing during the night. For the first two supports, I screwed two hinges to each end of the ply lined box over the wheel arch. This would be the point from which the bed would pivot. I reinforced the wheel arch box with CLS and corner brackets. Next, I screwed CLS into the remaining bulkhead for the top end of the bed to rest on when it came down. Lastly, I screwed two wooden legs on hinges to the side of the bed. These would fold away when the bed was raised, and also had adjustable feet on the ends to make sure the bed was flat when lowered.

The bed took one evening to make, and the installation took the best part of a day once everything had been secured and the glue had dried. The final touches were to add two bungee cords hooked on brass D rings across the bed to hold the mattress and quilt in place, and a strap tied from the roof to hold the bed when it was folded upright.

IMG_0452

Finishing touches
It may not sound sufficient, but once the van has been ply lined, the bulkhead has been edited, the floor has been laid and the bed has been installed, the van was perfectly suitable for a summer vacation.

The finishing touches of the van centred upon practicalities, such as foam matting and strategically placed bungee cords to secure the bike to the side of the van, especially when navigating rough and twisty roads. Another item I installed was a small table onto the rear door since the van was devoid of any useful flat space once it had been kitted out with a bed.

Curtains are almost certainly required unless you have a large van where it is dark enough in the back not to be seen. Curtains also allow you to get changed and retain what is left of your modesty after opting to live a period of your life out the back of a van. For the installation, I opted for a nice set of blackout Paris themed curtains which I installed on a metal rod running along the top of the bulkhead.

Other necessities are the ratchet straps I installed to keep my storage boxes from sliding around too much when driving on mountain roads, and a nice tea light lantern to retain a homely feel whilst sitting out a Scottish winter storm.

Two final items which I must mention are the two items which really individualise my van, give it a little avant-garde and provide a good conversation starter.

The first is a Monet. The Artists Garden c.1873 to be precise. I do like a good painting, and I thought there can’t be too many vans with one in the back. Sadly I wasn’t able to afford the real thing with my remaining budget, so bought a print instead and framed it in a wooden trim. I then balanced this with a motivational jet fighter poster on the opposing wall.

The second item is a replica Napoleonic sabre. Clearly if you put up a Monet, you also need a classical weapon, and so I chose a sabre for the only reason to ever trump self defence; the sabrage. The sabrage is a rather elaborate way to open Champagne (or Cava and Prosecco), and clearly an absolutely necessary skill to master in order to live a fulfilling van life.

IMG_0451

Van life
This final section focuses on what it is like to actually live in the van, post successful conversion. Most guides end once the final nail has been struck, but in reality converting the van is only 1% of the process, albeit 90% of the effort. The remainder of the process is living in the van, either for a night or for an extended period. Only when you actually live in the van will you determine what works and what doesn’t.

I have now stayed in the Fiat Doblo GOAT for perhaps 50 days spread evenly over the past year. I have done both summer and winter trips, and spent at most 7 continuous nights in the van.

What I have learned is that the Fiat Doblo in the long wheelbase model is perfect for short trips for almost any activity when kitted out as above. (The long wheelbase model gives the added advantage of having a sliding door on both sides of the vehicle which does give a little more freedom to search for kit when fully loaded).

The main benefit of this type of van is its size, and thus the ease of driving, parking, and relative fuel economy is notable. At 90bhp, acceleration when merging onto a motorway is less than ideal, however.

Overall, it really is a solid van, and I think the key word is capable. It is capable of doing most things, accommodating equipment for most sports, and providing a decent night sleep, most of the time.

Having been through the process however, there are a few points which I feel are worth noting when searching for the ultimate campervan conversion.

Learning Points
One of the main points to bear in mind when choosing a van is rear windows. The Doblo panel van doesn’t have any, and consequently this means the back of the van is very dark almost all of the time when the doors are shut. This is good for sleeping, however for living, it can be quite depressing to be confined in a dark room, unable to see out. The open curtain does provide a certain amount of light, but nothing beats a set of tinted windows in the back to really keep an eye on the weather and life outside your little bubble.

The rear doors on my van are standard split doors (open left and right) which fully open to allow great access to the loading area. An improvement in this area would almost certainly be a tailgate type door for the single reason that it is a great protector from the rain. After many bike races, I have been left wishing I had a tailgate door to get changed under to avoid the back of the van becoming soaked from my wet and muddy kit. Additionally, when cooking on extended trips, or even just wanting to air the van, it gets incredibly difficult when the rain starts and in honesty is not much better than a tent in that respect. A tailgate simply makes life much more bearable for those days when rain is unavoidable.

Insulation is another key point which I haven’t added to my van, but is worth considering for any winter trips. The roof of most vans is a single sheet of metal, and so any heat quickly dissipates and is replaced with freezing air in winter; in summer the opposite scenario prevails. It is worth taking the time to insulate your van, as even with a heavy duty sleeping bag, it really is quite grim trying to wake up at 5am whilst icicles are gradually forming above your head. Insulation can also be added to the floor too. I purposefully avoided gluing my vinyl flooring so it can be taken up with ease, and an insulating layer can be added underneath. Still nothing beats a shag pile rug for warmth and comfort.

What happens if you really do want a shag pile rug and to also transport bikes and dirty kit? Sadly this is the caveat with smaller vans and thus the only answer to that is to buy a bigger van. No matter how skilled you are and how imaginative you can be, the space in a small-medium sized van is always going to be the ultimate limit. No matter how well you design your space, you are also never going to be able to stand up or even get close to vertical in the small-medium class of vans. For that reason, it is definitely worth considering vans similar to the VW Transporter or the Mercedes Sprinter. With that type of van, your ability to go away on extended trips is also enhanced as you can fit items like a sink, mini cupboard and a fridge which really help avoid the closet syndrome faced in smaller vans after a week or less in harsh conditions.

In the case of vans, bigger certainly isn’t always better, and over my year of use, I haven’t felt particularly restricted due to not having a larger van. There is however one feature which I would recommend for small vans, which only comes second to rear windows: rotating front seats. Rotating front seats really are the holy grail for small-medium sized vans. As anyone who has this type of van will testify, firstly the front seats take up a significant amount of room, and secondly, it is incredibly difficult to design a comfy seat. The obvious solution to this is at least one rotating front seat which delivers a multitude of benefits ranging from increased space in the back right through to feeling a little more human rather than sitting hunched on a poorly designed bed in the back.

Epilogue
Hopefully you can now see that there is so much more to a campervan conversion than simply fitting a bed and hoping for an enjoyable trip. As my final word on small-medium vans, I have found the Fiat Doblo to be a superb van to convert and live in, especially for short trips. It is the ideal van for a DIY conversion, and I think a stepping stone to a full sized van conversion if after a year or three, once you have decided it is for you, and you have the capital to invest in a larger vehicle.
post image

Ben Alder Speed Climbing Attempt

Recently, I’ve been searching for a challenge which would really test me, force me to push a few limits, and take me back a little way to a particular test I’ve dealt with on some Himalayan mountains, namely, self-reliance. To be able to look after yourself in challenging situations is both satisfying and rewarding, but I wanted to find somewhere I could push myself within the confines of Scotland. Scotland isn’t the most remote place in the world – this is evident from the availability of Google Street View throughout the country, but I just so happened to spot a particularly remote mountain while perusing an ordinance survey map earlier this year.

Ben Alder at first glance looks to be an easy to reach Munro, but having a closer look reveals it’s one of the most remote mountains in Scotland. There are three roads which triangulate the mountain, but they are all around 10 miles away and lurking behind other mountain ranges. At 1,148m in elevation, Ben Alder is interestingly, albeit slightly irrelevantly, home to one of the highest bodies of standing water in the UK.

After doing a little research, it became clear that to my knowledge, no one has yet climbed Ben Alder in a single day on foot, and the only realistic way to do it in a day was to either take a bike, or get permission to drive up one of the various tracks dotted around the mountain. But then the little spark went off, and I realised the challenge that could be had: would it be possible to park the car on one of the 3 public roads near the mountain, and then climb Ben Alder and return to the car in a single day? This would have to be without the use of a bike, and without driving down any tracks which may have varying permissions depending on the land owner.

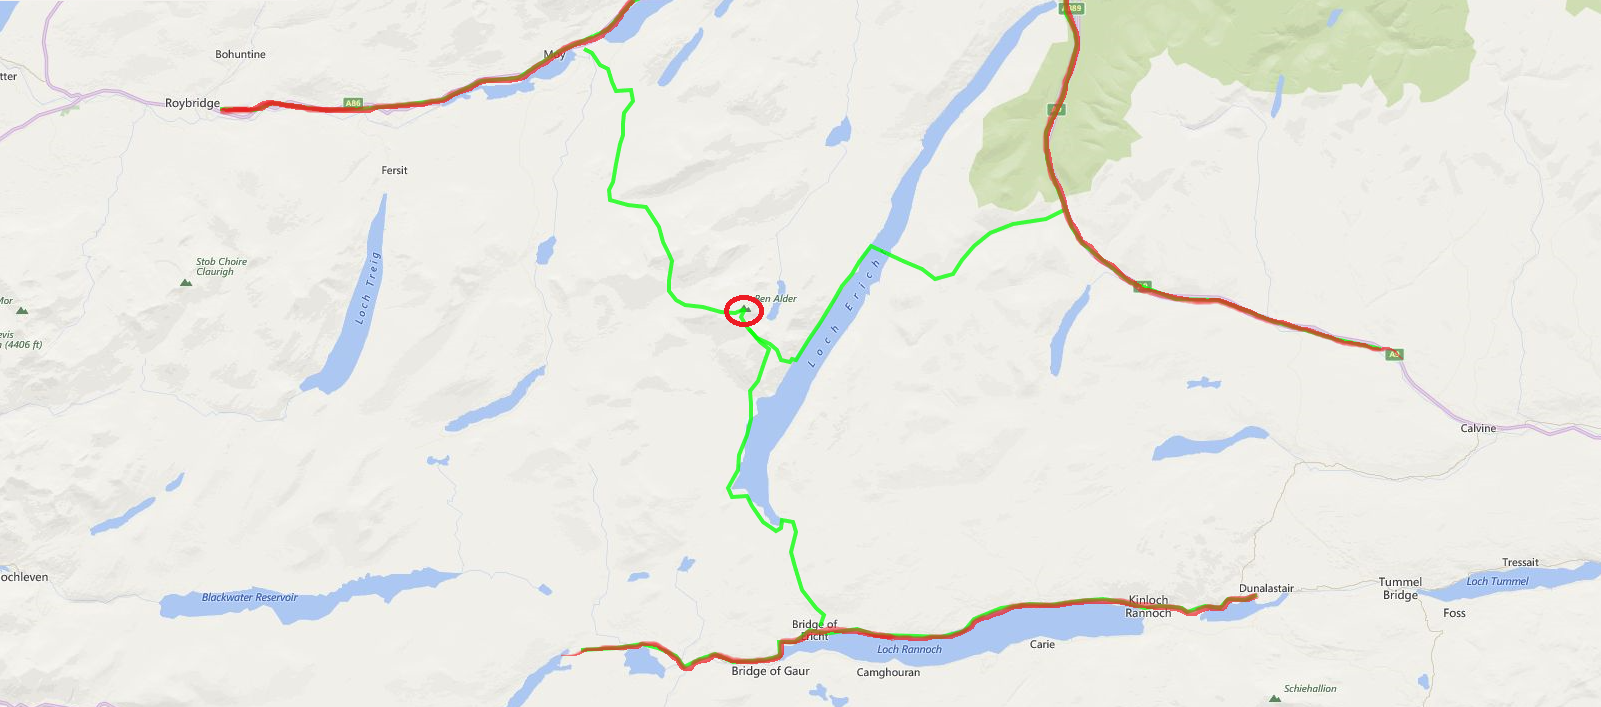
To put this in perspective, here is an overview of the area surrounding Ben Alder. The map below shows Ben Alder circled in the middle, the main roads surrounding the mountain in red, and the 3 main routes to the mountain in green. Each route is around 10-12 miles in length, and for scale, the loch to the east of Ben Alder is 14.5 miles long (Loch Ericht).

Route Map Choice 4

To find out if it would be possible to complete any of the routes in a single day on foot, I would first have to choose the best route. I ruled out the route to the North West from Moy due to the multiple mountains between the road and Ben Alder. The route to the South was the longest, and actually looked quite boring. It may have potentially been the quickest route, but it was essentially walking along a river then a loch for hours and hours, before ascending the hill, then returning back to the car.

The route I opted for was from the North East (from Drumochter Summit on the A9). It was the shortest route, but it had an obstacle which I assumed put most people off from taking this route, mainly Loch Ericht. I’m still not entirely sure whether anyone has ever climbed Ben Alder from the A9 in any number of days.

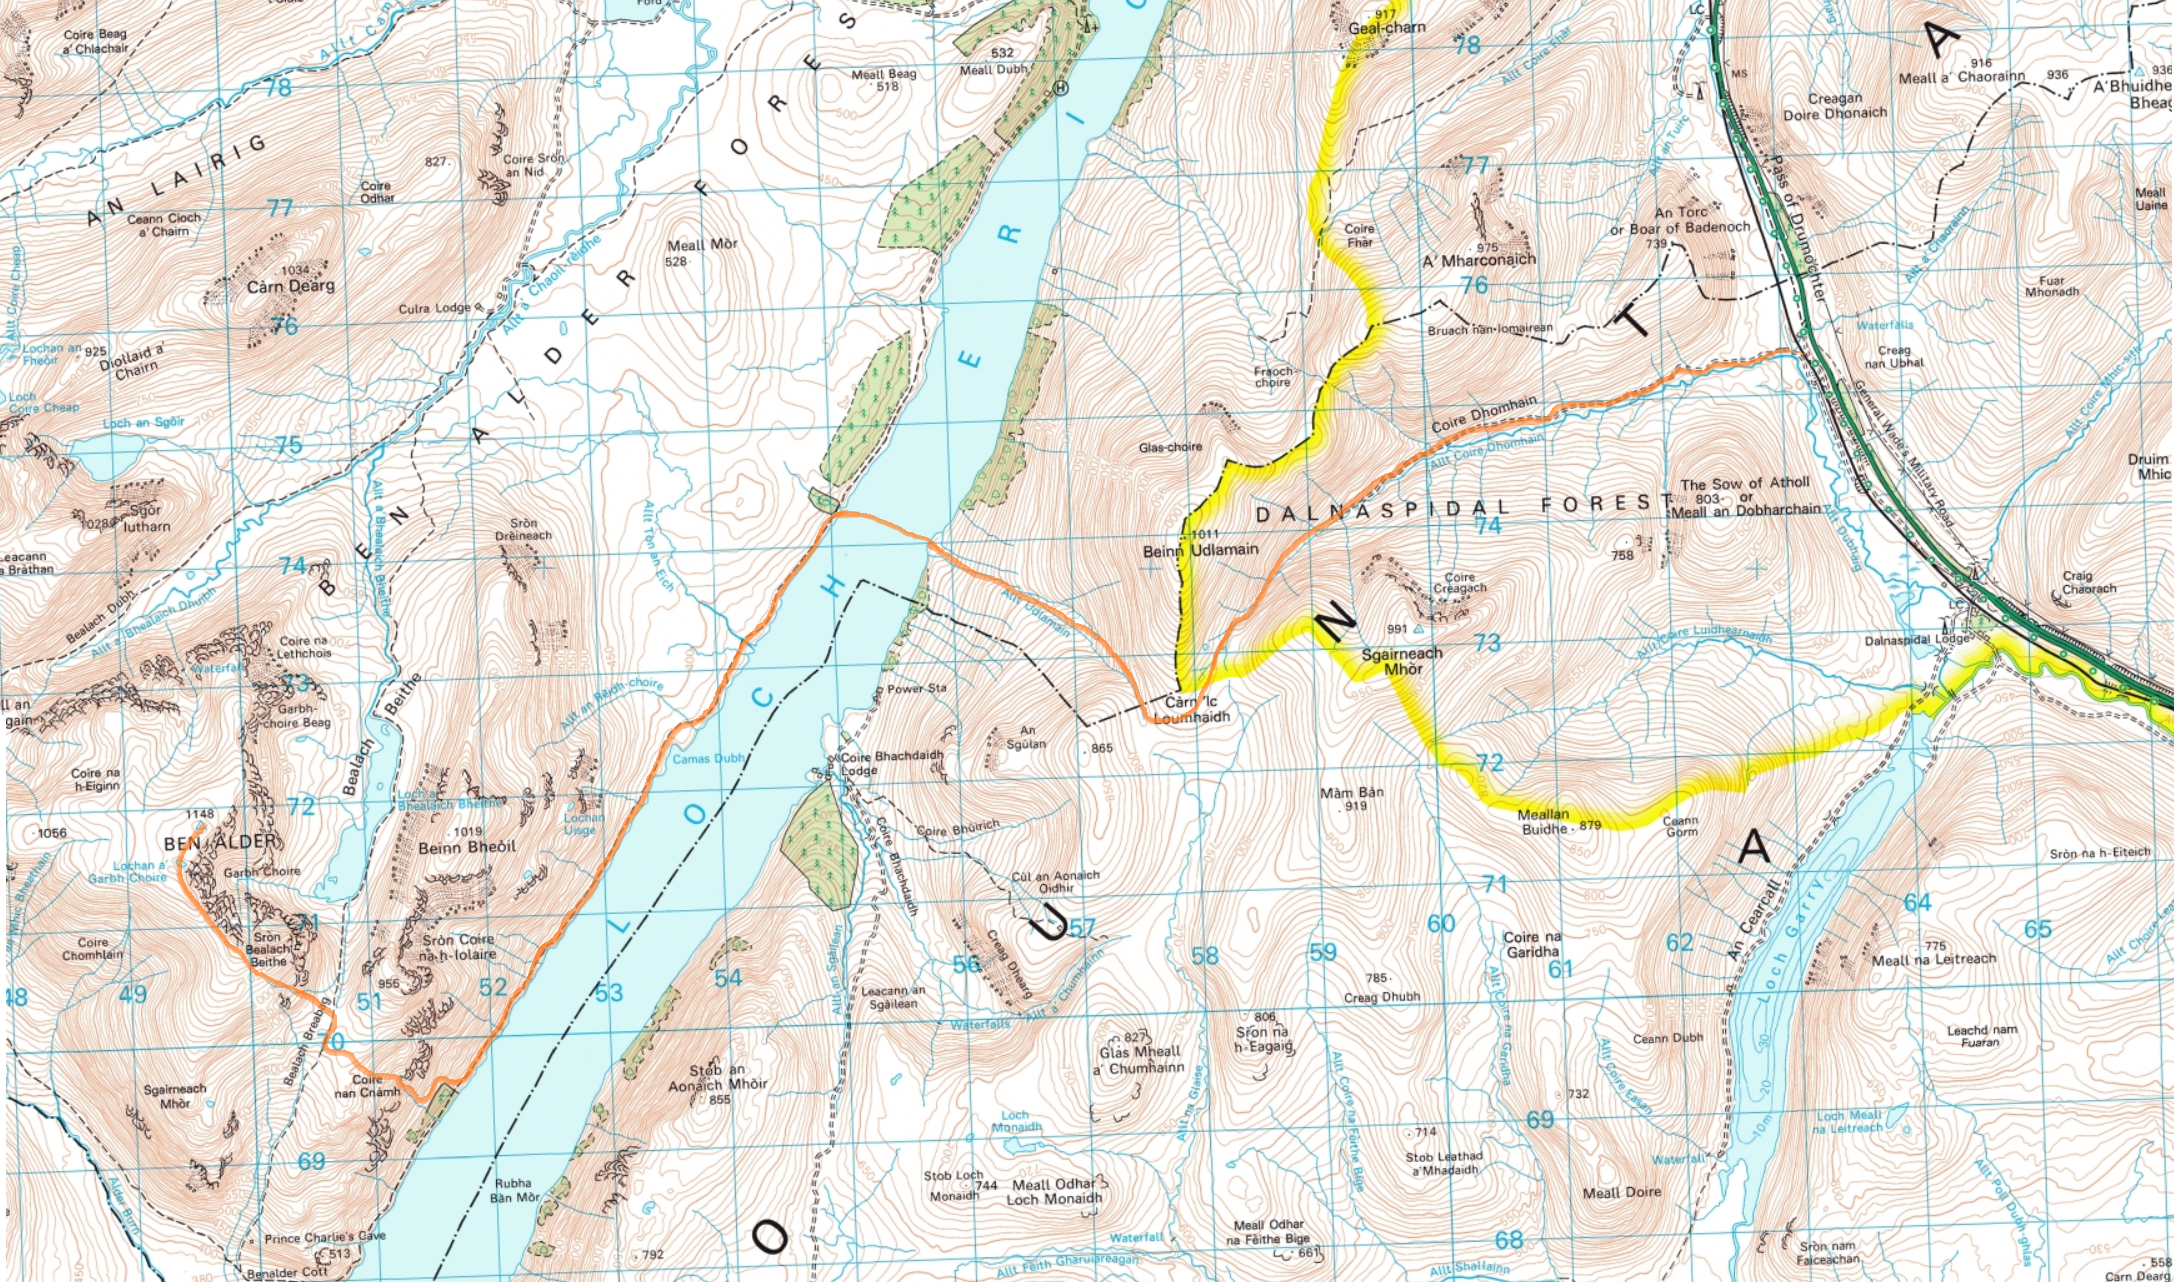
With my route chosen, I started to plan things in a little more detail with an Ordinance Survey map. From the map below, I decided I would park at the A9 and walk along the track through the Dalnaspidal Forest, which had decidedly few trees; none in fact. From there it would be a simple case of walking up to the col, down to the loch, somehow cross the 1km wide, 150m deep loch, walking for 5km along the other side of the loch, then climb up the side of Beinn Bheoil, before taking on the final slopes up to Ben Alder. This would be about 10 or 12 miles of walking one way, and I assumed I could possibly reach the summit in 6 or 7 hours. Of course the return journey would have a lot more downhill, so I could complete this in a spritely 5 hours.

In truth, I didn’t actually know if any of the route would be possible, and even if it was, I had no idea how long any of it would take.

Route Map

The 4th June (2016) looked to be a perfect day for the attempt. A cool morning, but then good weather throughout the day. I packed on the Wednesday beforehand, making a list of all the food I would need to buy on the way.

During packing, I was feeling cautiously pessimistic, and so the first item I put in was a sleeping bag (which seemed to defeat the point of trying to do the climb in a single day). In reality, this would be left behind as a carrot to walk quickly back towards. I packed two rucksacks. The first was a 65L ski touring bag. In it, I would talk 4L of water, food with many thousands of calories, a hat, gloves, water proofs, belay jacket, GPS, a small running bag, and crucially a boat. Well, an inflatable dinghy, commonly called a pack raft, to be precise. I knew that the best way to tackle Ben Alder would be to first take all my kit to the loch. So for 2.5 hours, I slogged up the hillside through the non-existent forest, and into the clouds. I started the walk at 6:30am, and since it is a Scottish summer, I wouldn’t have to worry about darkness unless I happened to still be walking at 1am the next day, when it would be slightly dusky.

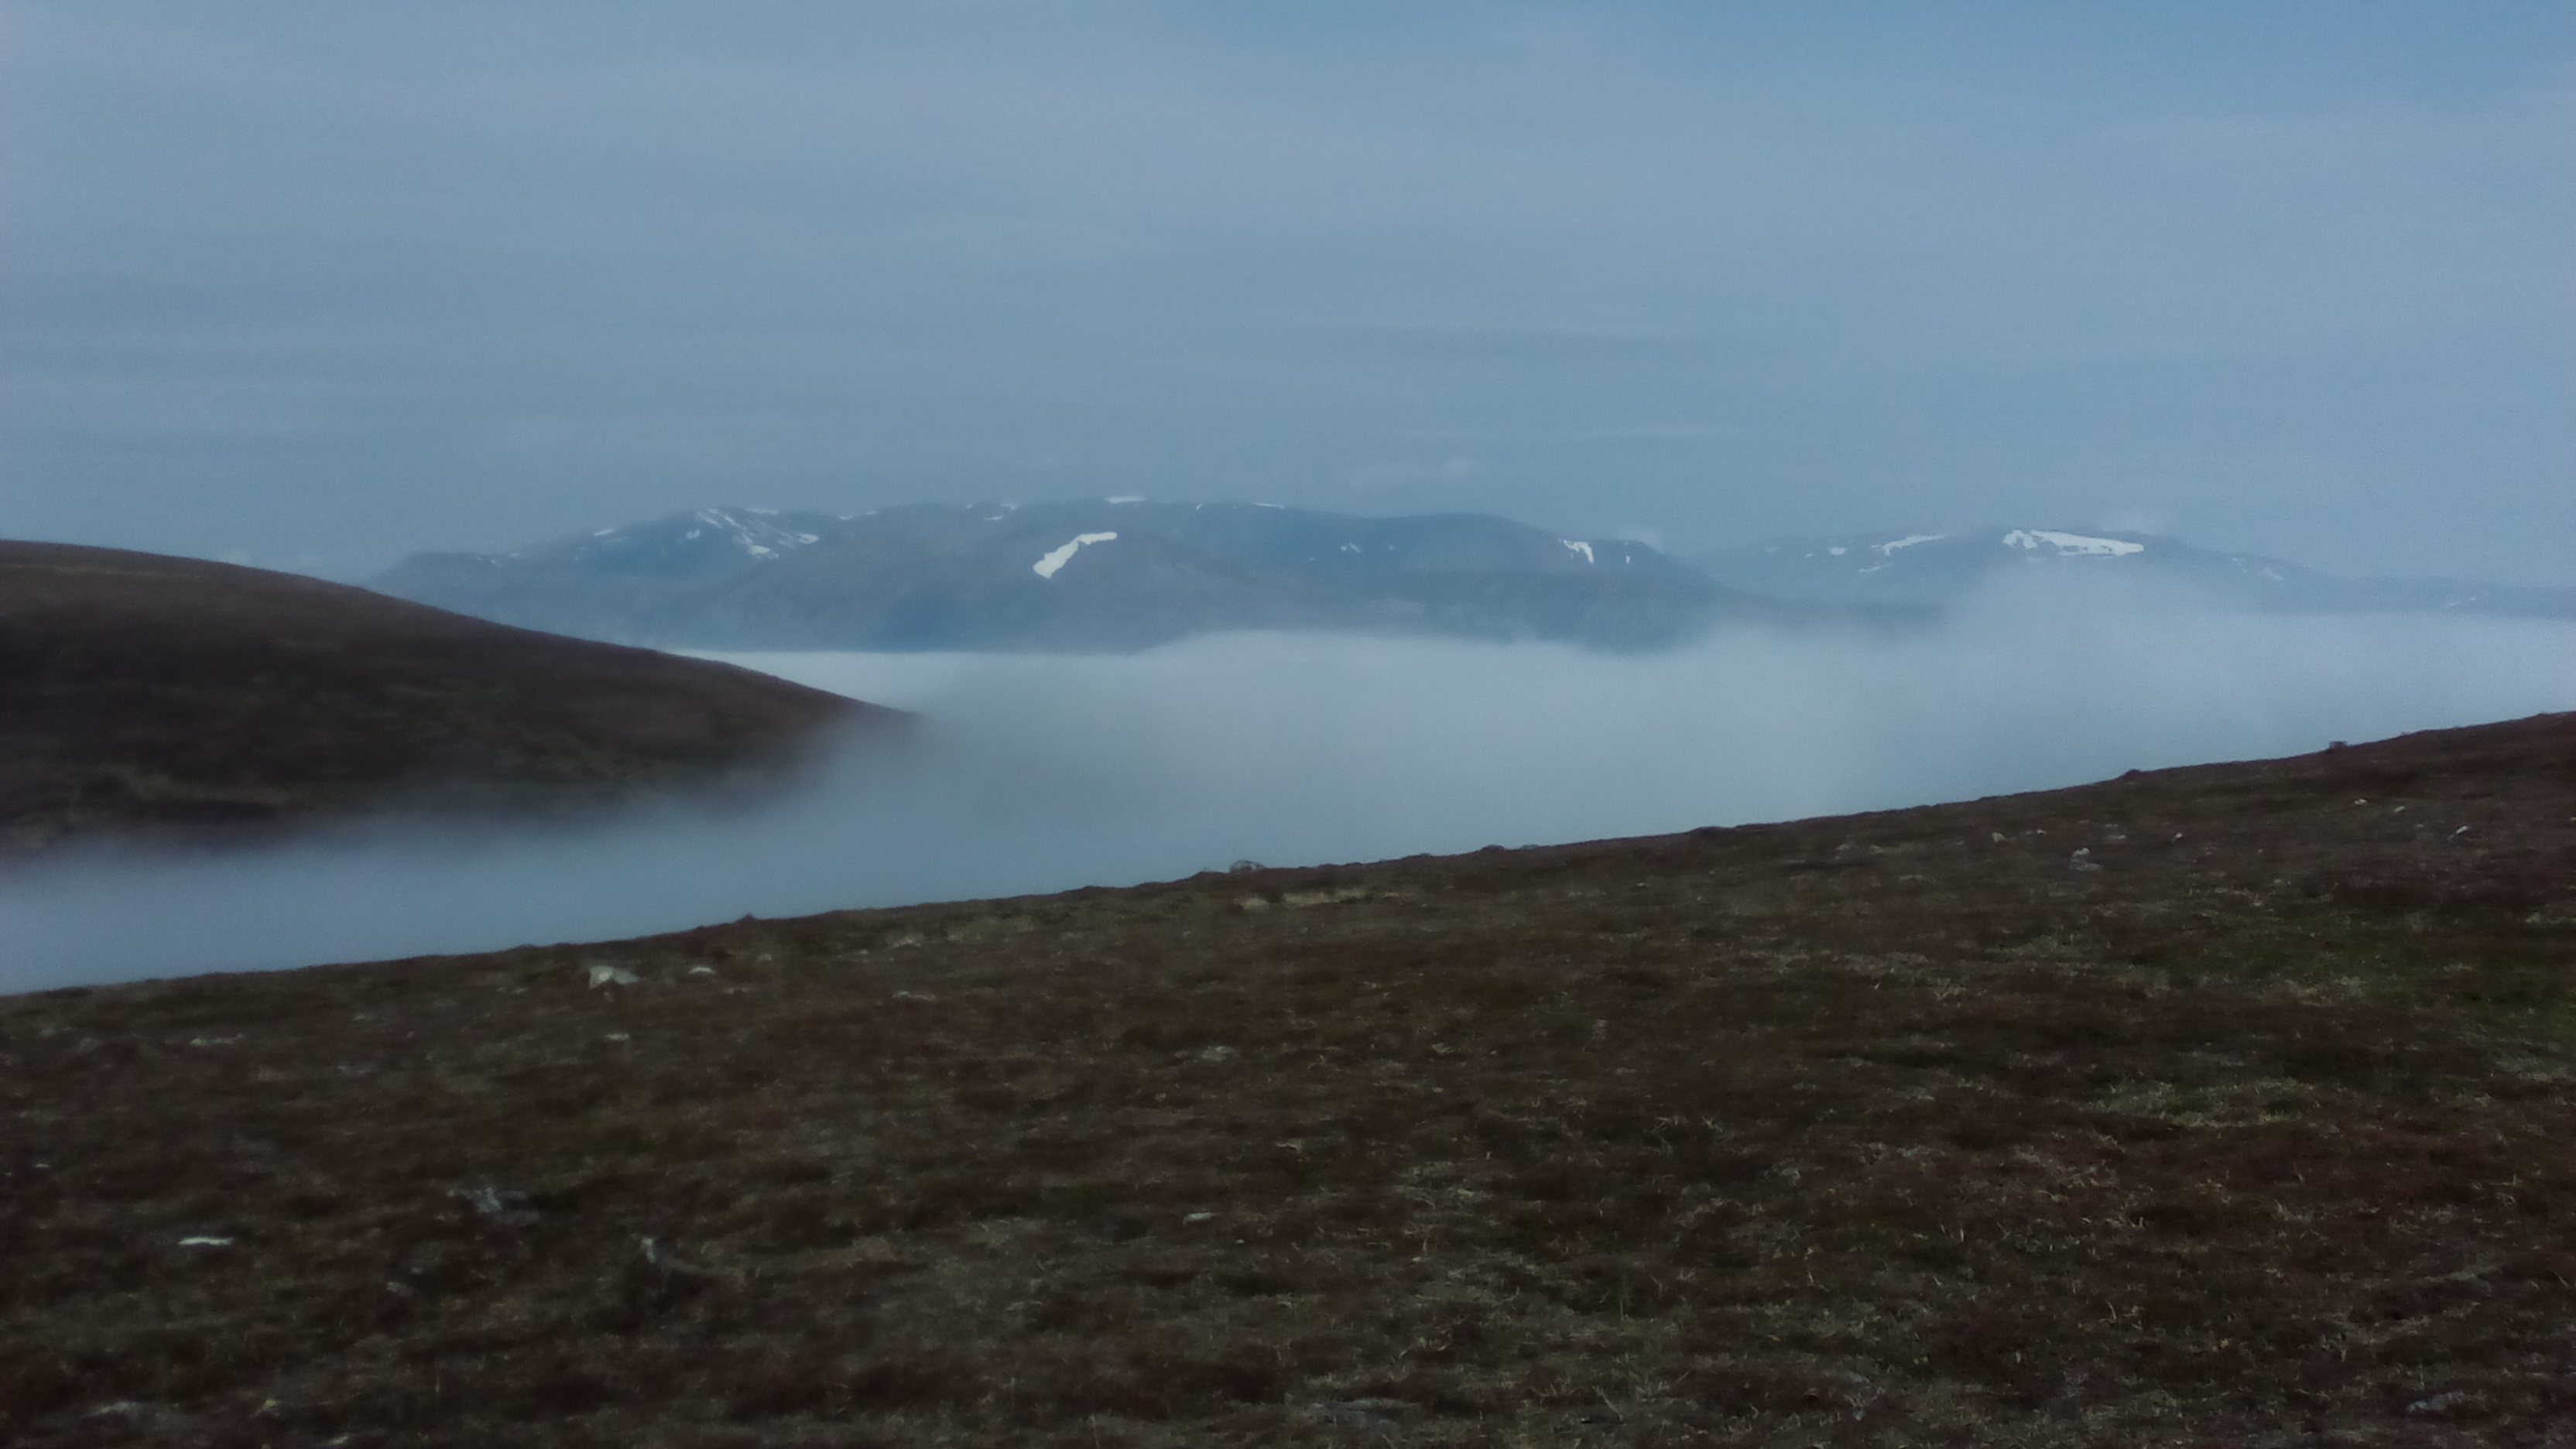
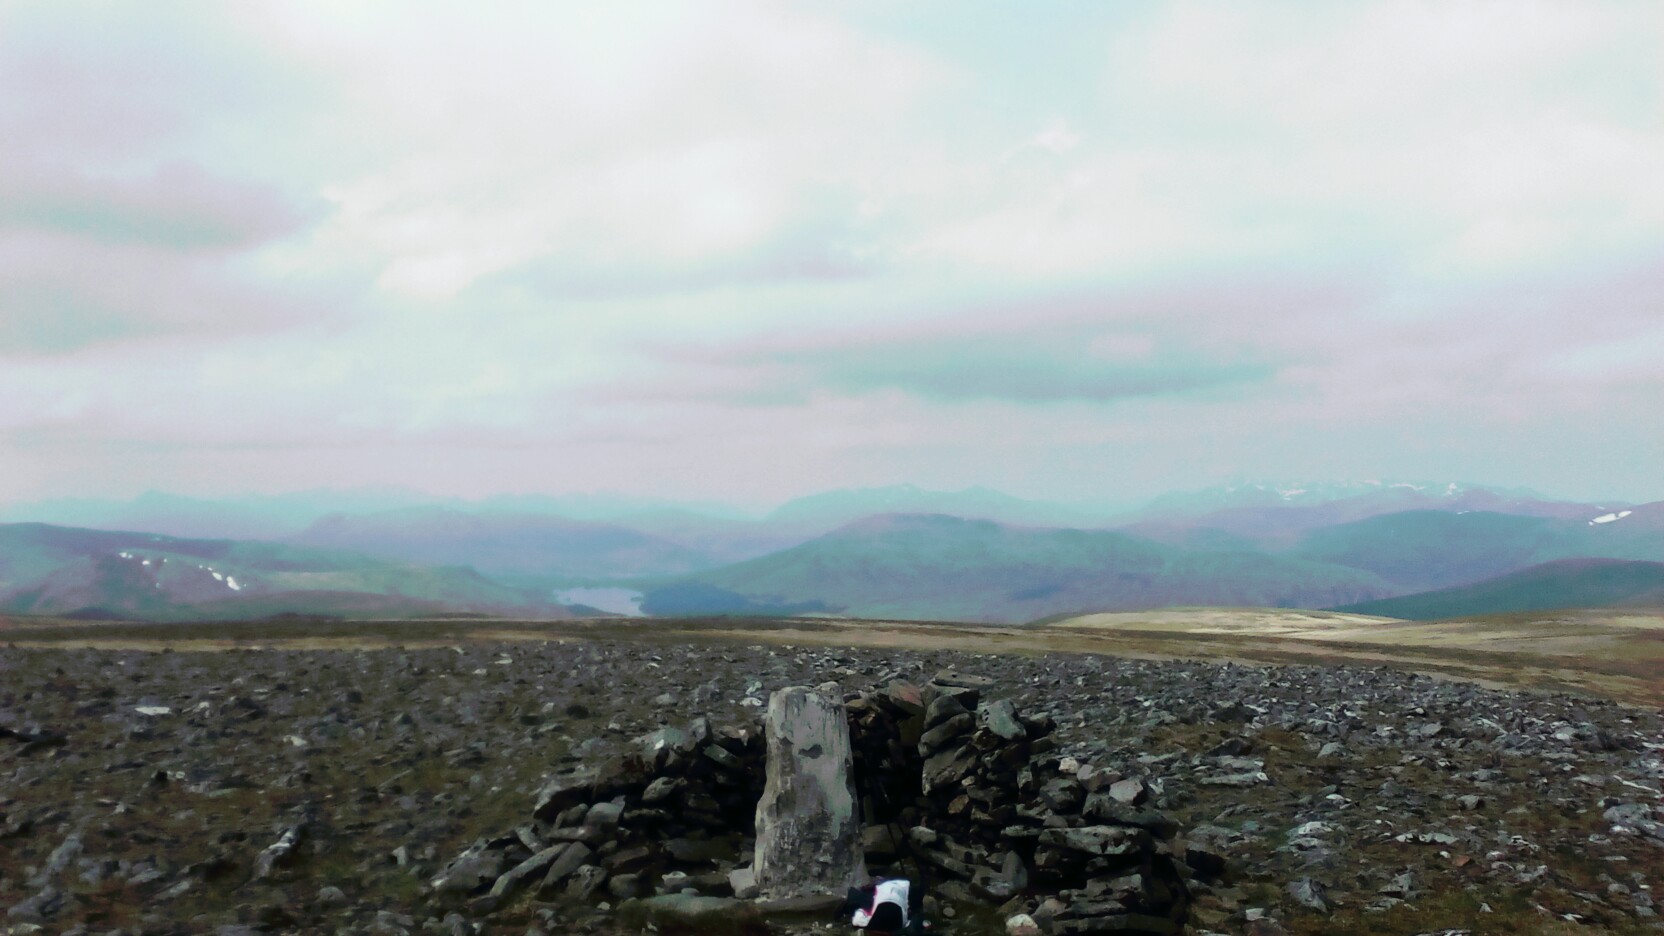
After 2 hours of walking I reached the top of the col, and for the first time, emerged through a cloud inversion and basked a little in the sun. Then I took a glance over to my left, and started to feel a little sick. The loch was some way down in the mist, so I didn’t have a scale, but I saw Ben Alder for the first time, looming away in the distance, a distance which could have easily been 20 or 30 miles away (the furthest mountain away, just left of centre in the image below).

IMG_20160604_082353

I tried not to think about that, and instead, descended back into the clouds towards Loch Ericht. After 2.5 hours (9am), I reached the shores of Loch Ericht, and got to work pumping up the inflatable. I’d previously taken it on the rapids of the River Dee (https://www.youtube.com/watch?v=EC7h8N3yuxM), but had never previously crossed a loch before, or even any notable stretch of extended water. Getting in to the loch, I had a fair amount of apprehension, and it wasn’t until I got to the middle and looked down the length of the loch that I realised exactly what I was doing. The area I was in was practically uninhabited, and so if anything went wrong, I was on my own, I had to get myself out of the situation, and if that meant giving myself an enema Bear Grylls style to stay alive, so be it.

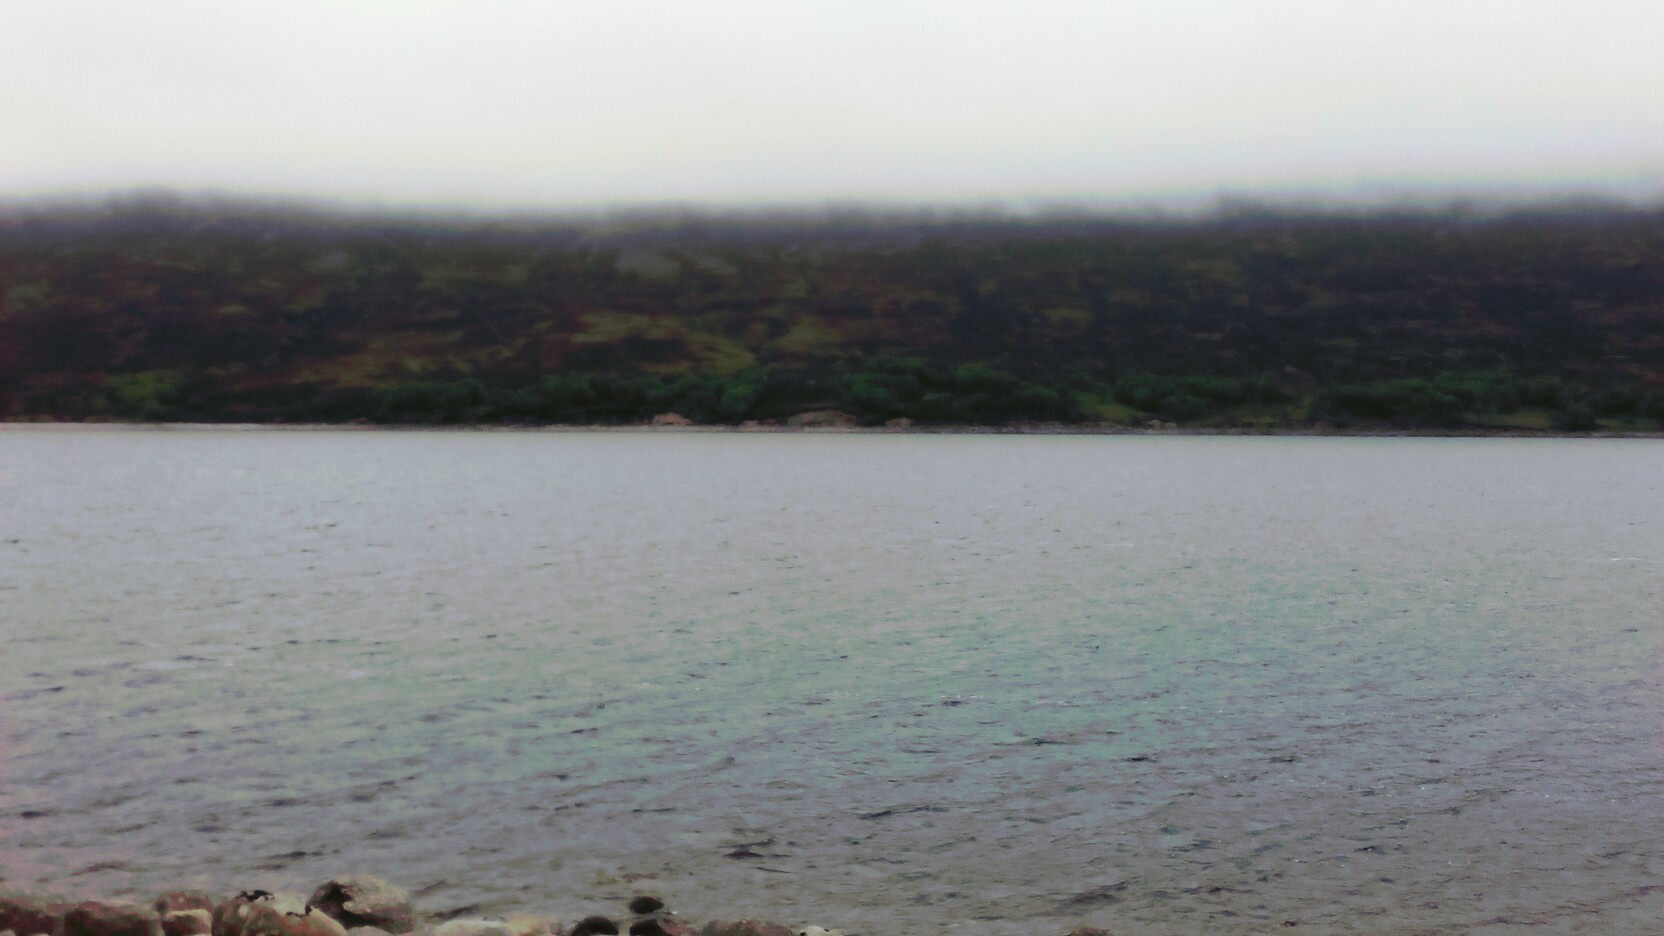
Fortunately, I got across relatively choppy waters, and then got ready for the third phase of the climb. This meant leaving the boat by the water’s edge along with my heavy rucksack of water and warm clothing. I replaced the big rucksack with a small running bag, 2L of water, a coat, gloves, a GPS and some food, and then headed on the path along the side of the loch. I felt the gear stash was a great idea for keeping the speed up and maintaining good progress, as there wasn’t any real need to take anything else. I would describe what I took with me in terms of kit as minimal. Literally the bare essentials I would need which would act as a safety net by allowing me to go quicker rather than forcing me to spend the night out under the boat/stars.

IMG_20160605_084409_967

By 11am, I reached the base of the climb. I had been traveling for 4.5 hours, and my time schedule was no longer existent. I still didn’t know if I would make it to the summit in the day, so I set myself the turnaround time of 12:30 or 1pm depending on how I felt. Even on a 1:25000 Ordinance Survey map, there are no paths to the summit of Ben Alder, so I improvised by climbing up a steep, mostly dry waterfall to the col where Ben Alder joins Beinn Bheoil. At this point I frightened a small herd of deer, and then frightened myself when I came across not one but 3 human beings collecting water in their own attempt to climb Ben Alder. They choked a little when I said I’d walked from the A9.

Even when I reached about 1000m, I still didn’t know if I would make it. The summit plateau was over a kilometre in length and it wasn’t until 12:20 (5 hours 50 minutes after leaving) that I finally reached the summit. As this point, I took a quick few photos, and then tried to decide on the best way back. It is hard to stress the self-reliance demands in a situation like this, where you are now at the furthest point away from safety which is located somewhere behind two mountain ranges. Since no one has previously documented any attempts, I had nothing to go by. I wasn’t sure if it would be best to descend to the North of Ben Alder or attempt to descend via the steep waterfall I had come up. This was a key decision to make since there was now the prospect that this route was going to take the best part of 12 hours or more, and I still had to re-cross the loch and climb back over the first mountain range.

IMG_20160605_084553_377

With no one to ask, I did a quick self-assessment, determined I still felt I had enough energy at this point to complete the trip, and then decided to descend via the waterfall based on the fact that I could always bum slide down the grassy slopes to the side if necessary.

A further long slog occurred, and it wasn’t until around 3pm that I made it back to my inflatable which had slightly depressurised in the afternoon sun. I didn’t waste time in topping up the air, and so got straight back into the loch with slightly bigger waves than before, and tried not to think about the 150m of blackness below me.

Upon getting back to the other side, I realised that for the first time, I could probably complete the challenge, but since I had already been moving for around 9 hours, I would be looking at a total of 12 or 13 hours car-to-car by the time I managed to get over the final mountain range of the day. At the top, I finished my last drop from an original 4L of water (which I thought was impressive), and then plodded on for the remainder of the journey with the A9 in sight nearly all the way.

It took me 12 hours 39 minutes to complete this little challenge, and I believe I’m the only person to complete Ben Alder in a single day, on foot from the nearest road. I’m ignoring the boat in this since it was 10 times harder and 10 times slower than walking the same distance…

Physically, despite not being able to easily walk today (the day after), I didn’t find the day too taxing, save for the final climb which was in 28 degree Celsius heat. What was truly taxing, and made this challenge easily one of the hardest things I’ve done however, was the psychological challenge. The challenge of being along, making decisions, and actually not ever knowing if you will be successful until you’re physically standing on the summit or back next to the car (having dropped your keys in the loch). The energy required to constantly be checking the weather, assessing the bad route you’ve chosen, or debating if you’ve got enough water for a round trip is what separates this challenge from all the super hard physical challenges I’ve had.

With most professional sport, it’s comforting to know that at the end of the day, no matter how much energy you’ve expended, and no matter how exhausted you are, you’ll finish up sitting comfortably, either in a car or the back of an ambulance. But in the mountains there are so many more possibilities.

For those interested in the route I took, I manage to track the route via GPS which you can see here: https://connect.garmin.com/modern/activity/1198710622

And as a closing remark, I would implore you to go and explore this remote corner of Scotland. Despite the psychological challenges, there really is nothing more refreshing than standing on a big hill, no matter how you have got there, taking in the 360 degree view, and not seeing single person for as far as the eye can see.

#MattAlder

post image

Scottish Winter 2011

Photos courtesy of Zac Poulton, James Morrison and Mark Scales

So having just returned from my first Scottish winter, I thought now would be a good time to share the experience.

7172758691_77aaba5afa_b[1]

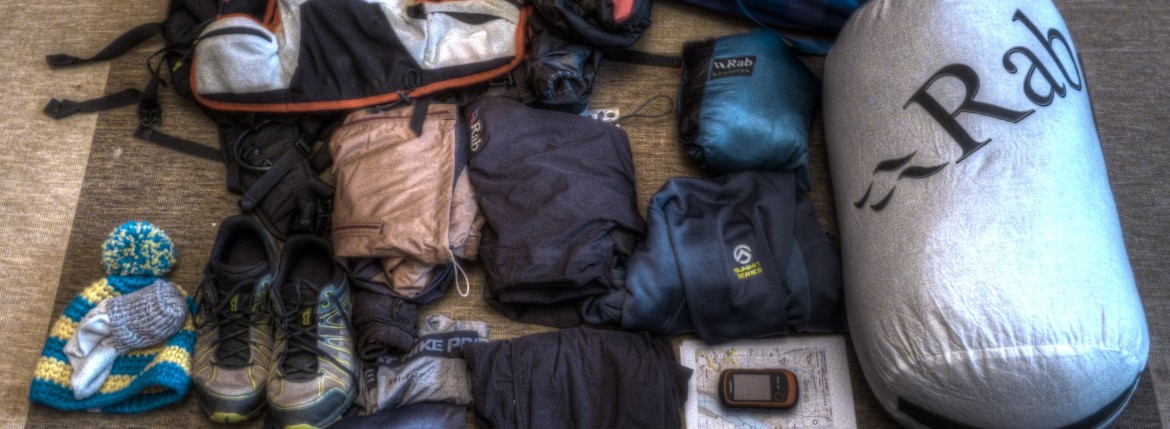
It’s hard to know where to start, as packing my bags for the trip seems a lifetime ago. I guess a good place is in fact the packing. So having seen the kit list from AP, and confident I had most of the kit; I set about the challenge of packing all the kit into two bags. This went strangely to plan, and left me with only my boots which would have to be worn on the plane. Being yellow, I knew they wouldn’t fail to turn heads in the exotic departure lounge of Luton.

8475136001_180d3aa7fb_b[1]

Being on the flight was a relief, as I hadanticipated being questioned about having an ice axe and crampons in my luggage. I spent half the flight amused by the Scottish dictionary that Easy Jet had kindly provided, so you could navigate your way around the Scottish slopes like a pro.

I then spent the rest of the time with the realisation I had a 5 hour wait at Buchanan bus station in the centre of Glasgow, how bad could it be?

The bus station was an interesting place, where birds came for the relative warmth, but then realised it was colder inside the bus station than outside, so spent half an hour trying to operate the bird proofed automatic doors. As all this excitement unfolded, I sat on a low backed metal bench, the most uncomfortable type of bench possible, shivering away for 5 long hours.

Eventually the wait was over, the bus to Onich arrived, and after a long drive through dark wilderness, I reached the hotel about 6pm, after a 16 hour journey. This gave me an average speed of 23mph, which is incredibly slow given the 600mph ground speed of the airbus.

That night after settling in at the Onich hotel, I finally met my course companion, James, a first officer for Ryan Air; and our guide/instructor Zac. Also having a passion for flying, it was great to meet James, the first pilot I have ever met, which was a great talking point for the week. After discussing our hopes and aims for the course, sleep soon followed.

8476223794_6db50831f4_b[1]

Up early the next day, we drove out to Glen Coe, but after realising the snow was far from ideal, we drove back up to the Fort William Ski Centre, and took the Gondola up to about 700m to begin practicing the basic boot work skills. This then progressed to the famed ice axe arrest, with all the possible variations, including the possibility of being handed an axe whilst hurtling down the mountain at break neck speed. Eventually, we donned crampons, and with great aesthetics, plodded up to Aorrach an Nid, the high point of the day, before eventually descending to the van, and meeting a guy from the SAIS, who told us the snow pack was ‘one finger, pencil, four fingers’. After dinner, Zac gave us a lecture on avalanches that padded all the information we had been given throughout the day, and even explained the ‘one finger, pencil, four fingers’ as a way of ‘exploring’ the snow pack.

8475135163_057a94e54d_b[1]

Both James and I gained a great deal of respect for avalanches, but also a variety of methods we could use to create a good picture of the snow pack, to help avoid avalanches in the future. We also found out that James is a trained meteorologist, which was a great addition to our weather forecasting system, and unlike many weather presenters, gave a excellent forecast for the whole week, and being a pilot, he would say to 96.725% accuracy. At some point that night, I managed to vaguely sort my kit out into a rough drying system, that I would go on to perfect in later days.

The second day saw the introduction of a rope, to protect on steeper ground. This day also saw the introduction of the infamous walk-ins, which by the 4/5th day, I actually began to enjoy. Over the 5 days, I got particularly well acquainted with the walk-in to Stob Coire nan Lochan, which was the walk-in of choice for day 2. This was quite a shock to the system since the last walk-in consisted of a 5 minute walk to the gondola.

8475148835_49ecafa2f3_b[1]

Eventually we reached a grade I gully that led up the North West face of Gearr Anonach, and after gearing up like only a guide and 2 ‘students’ can (students taking at least twice as long after putting on the harness backwards, and crampons on the wrong feet), we started up the gully to practice bucket seats, and rope work. Reaching the top of the gully, we then unroped and climbed up the ridge to our first main summit, Stob Coire nan Lochan at 1115m. We then climbed down to the top of Broad Gully, created a snow bollard in the soft, wet snow, and abbed down the first pitch, before descending the rest of the gully in a very un-Ueli Steck style, and eventually found a snowman at the bottom.

7172757267_ba8e840f87_b[1]

A final presentation from Zac on an expedition to Baruntse, gave me a much more professional insight into the preparation I would need for the northeast ridge on Everest, and in a few days, completely changed the way I thought about my preparation schedule.

From this point onwards the course became far more climbing orientated on steeper and more exposed ground. The previous day’s snow was soft and wet, but from the third day onwards, the temperatures dropped, and on the fourth and fifth days especially, hard névé formed, and the avalanche risk dropped.

The third day was our first introduction to steeper ground, on the grade II ledge route.  Of course the first obstacle to most climbs is actually getting there, so we began the walk-in, roughly four times the length of the previous day, but much more manageable thanks to its steady incline. I did develop a worrying method of passing the time in my head, by counting the pattern of streams that crossed the path. Most were path, rock, stream, rock, path; however double rock crossings are also encountered leading to a path, rock, stream, rock, stream, rock, stream, rock, path pattern, however this was rare… moving swiftly on.

On reaching the CIC hut, we geared up, and started into the snowline. The snow was still soft, but the forecast was improving all the time. After completing the first two pitches, and seeing 3 people solo up past us, we gradually improved, and learnt the various methods for protection, and moving together. Having said that, I am still not sure the method of arresting a fall on a ridge by jumping off the other side counts as a straightforward method of protection. The weather was gusty with the occasional shower of spindrift. I assumed it could get much worse, after all, I was still unexpectedly warm and dry.

8475136399_40f5ddc3e0_b[1]

We eventually topped out on ledge route and onto Carn Dearg at 1221m. The Ben was still in the clouds at this point, and it would soon be dark, so we abbed off the metal flag marker of number 4 gully, and through the cornice which had been painstakingly cut a day or so before, leaving it just wide enough for a climber to squeeze through.

On the way down, we progressed with a bit more finesse than the previous day, and met up with Mark Scales, the guide just for the next day. After seeing Mark and his partner speed down the path to the car park, I became slightly worried at the pace the next day’s walk-in would be conducted.

After reaching the car park just after dark, we had time to think about what we had just achieved. A grade II route in Scottish winter conditions, not bad after 2 days on crampons.

8476224808_c7748f95fa_b[1]

After a deep sleep, and plenty of rehydration, I was just about ready to battle the next walk in. Mark in no way believed Zac carried the rope the previous days, but that was worth a try. After leaving, we headed over to Stob Dearg to try something on the north face, but the snow was far too patchy, turning the first half of the climb into a rock climb.

So we headed back towards the three sisters, and set off for the second time for Stob Coire nan Lochan.  The pace as expected was high, and half way through the walk in, I was constantly dripping with sweat, which says something when the valley temperature was around freezing. We made our way over the coire and up into the snow line, and geared up. Dorsal Arête was the climb of choice; however there was another group at the base of Broad Gully, so we set off for a grade III variation on the lower fan-shaped buttress. On the way, we practiced some of the more advanced foot work methods, and the techniques needed to climb the mixed ground of the arête.

7357977040_b2cbbbaf42_b[1]

Now armed with 2 axes, I belayed mark up the first section, struggling to give him enough slack. Eventually, after taking at least twice as long, I reached the belay, and repeated the process. Being 6ft, Mark was able to place all the protection high on the rock spikes. Being nearer 5ft, removing the protection was a nightmare, although the axe does become a useful extension of the arm. Eventually, higher up, we decided to stick to the arête proper, giving Mark an ideal opportunity to place more ridiculously high protection. After a bit of mixed, and ‘Fred Flintstoning’ on the rocks, we reached the final pitch, where I just randomly asked if I could lead. The reply was ‘yes, but you will fall twice as far if you slip’… Although not the best confidence booster, it meant every step counted.

7172770349_47d836e25c_b[1]

The view from the top was amazing, with cloud free summits on all but the highest mountains. It was in fact the first time we had seen the sun all week. After climbing over to the top of the lost valley, we descended down some steep névé which was the best snow we had seen all week.

De-gearing still took annoyingly longer than the instructors, but it was improving. We then raced down the lost valley at what felt like running pace, and 45 minutes later, were back at the van before dark.

Conversation at dinner that night revolved around James’s and my fascination of flying which truly is a never ending subject.

Friday was soon upon us, and that marked our final climbing day. The day before, I had decided to stay an extra night to avoid a 48h journey back home, which involved waiting back at Buchanan bus station for an hour, then sleeping over night at Glasgow airport, then waiting for my flight at 7pm the next night.

Fridays climb back again with Zac would oddly be our first Munro of the week, Stob Dearg, also known as The Beuckle, which was lower than previous climbs, but had the necessary prominence to count as a Munro.

7172769707_8ae2b87ece_b[1]

The climb was relatively straight forward, up a gully to the col, then across to the summit. However today we focussed on moving without the aid of a guide, and making our own decisions. The snow conditions were still good, with the widespread frost making for good climbing, and the lowest avalanche risk of the week.

In an effort to show how to look the part, Zac demonstrated the art of coiling the rope, as true guides look. I noticed if you combine this look with a few hexes on the rack, you can both look and sound like a guide.

After summiting, we then raced around to Stob na Doire at 1011m, although still not a Munro. After racing back to the col, we abbed down the gully, and after watching two people foolishly try to climb a buttress without ice axe and crampons, subsequently dislodging a melon sized rock, we de-geared and made our way back.

8476224598_8369111969_b[1]

That night was taken up with chatting to Zac about his invaluable advice for my next 2 trips in preparation for Everest, sharing all the photos from the week, and eventually talking to James about flying.

The next day, after finally saying goodbye to everyone, I was left in the hotel by myself waiting for the coach to Glasgow. The place was deserted, but it was the first time I had seen the place in the light, giving me a chance to see the beauty of the surroundings. The coach trip was the same, giving me chance to see and reflect on all the climbs we had done around Glencoe.

7357966982_89be168d04_b[1]

Arriving at Glasgow airport, the place was surreal, there was no one to be seen; the whole of Glasgow International Airport was empty! I counted the flights on the board, there were 7 flights for the whole night shown on a 3 screen board that had the capacity for 60 flights!

As James had predicted the flight was short and smooth; my car journey however was 6 times as long as the flight it’s self.

My first Scottish winter was over.

I could not possibly detail everything that happened. Even though I have almost written more than my dissertation, and even though it was a short 5 day course, so much truly happened. I experienced some of the best days on the mountains in this time, and really found the magic of Scottish winter climbing. Climbing over the week with 3 great people, I had the best week I could have asked for.
Special thanks goes to Zac, Mark and Adventure Peaks, who I will be joining in July 2011 to climb in the Tien Shan. I would recommend them wholeheartedly. You can find out more here:

Zac Poulton – http://www.zacpoulton.blogspot.com/

Adventure peaks – http://www.adventurepeaks.com/